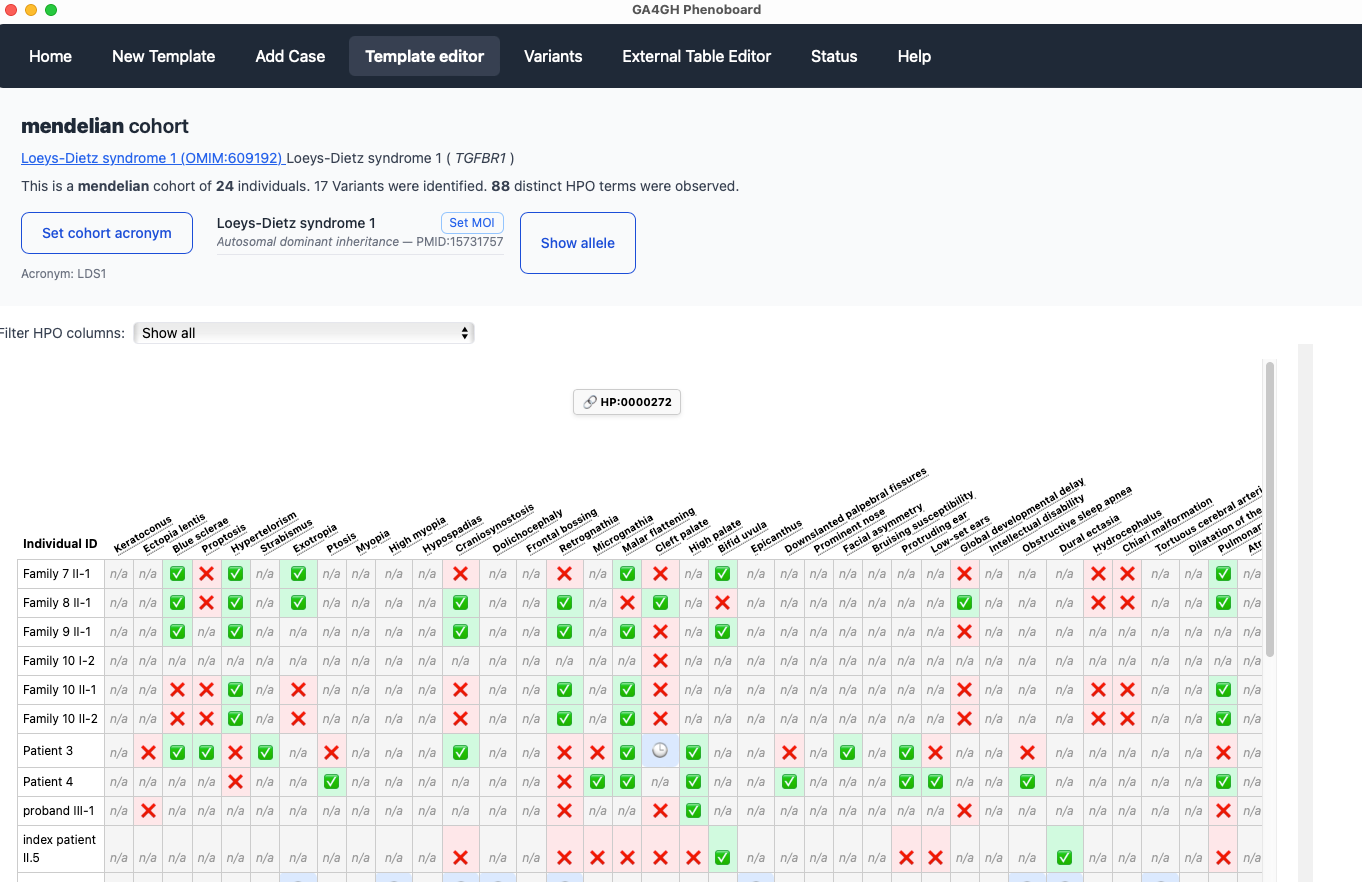
Cohort editor
This screen allows users to visualize and edit the entire cohort.
Final Review & Submission
After you have entered all of the data for each individual, phenoboard offers several functions to validate the curation data and export to file.
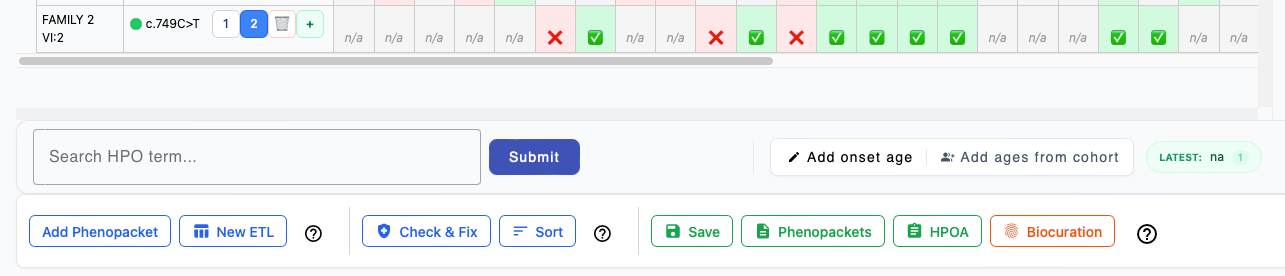
Add Phenopacket
Switch to the New Template tab to enter an additional case report to the current cohort.
New ETL
Switch to the External Table Editor tab to import an additional table of data about individuals to the currrent cohort.
Check and Fix
Validate the current cohort (it is recommended to perform this step before saving the cohort). Some operations can be performed automatically; for instance, if the only warning is that redundant annotations were found, then phenoboard can correct them automatically. For instance, if an individual is annotated with Perimembranous ventricular septal defect HP:0011682, then according to subsumption logic of ontologies, the individual is implicitly annotated to all of the ancestors of the term. Intuitively, it is easy to see that if an individual has Perimembranous ventricular septal defect HP:0011682, then the individual can also be said to have Ventricular septal defect HP:0001629, and it is redundant to annotate the latter term. Phenoboard will automatically remove such redundant annotations if the user confirms the message that appears after clicking Check & Fix.
Sort
If desired, the rows of the cohort can be sorted according to PMID (earliest to latest) using this button.
Saving cohort
To save a cohort, click on the validate button to check for errors. The Sanitize button can automatically correct some kinds of errors. If this does not work, the offending table cell(s) will need to be revised.
Phenopackets
The Phenopackets button exports each row of the table as one phenopacket.
HPOA
The HPOA button exports HPO annotations in aggregated tabular format.
Biocuration
This button adds your ORCID identifier to the cohort export file.
Cohort configuration
Phenoboard uses an acronym for each disease. We prefer the acronyms defined by the Online Mendelian Inheritance in Man resource.
For instance, for Nemaline myopathy 7, autosomal recessive, the acronym is NEM7, and can be found in the title line of each disease entry following the semicolon. In cases in which OMIM does not define an acronym, create an acronym in the same style.
Phenoboard saves the cohort files using a combination of this acronym and the gene symbol. For instance, PAX3_WS3_individuals.json has a gene symbol (PAX3) and an acronym (WS3) for Waardenburg syndrome, type 3.
We also need to specify the mode of inheritance. We recommend consulting OMIM or the Human Phenotype Ontology for this. Rarely, some diseases have two modes of inheritance (autosomal dominant and recessive, for instance), and in these cases, both should be entered. Phenoboard requires that a PMIM be entered to support the assertion of the mode of inheritance. Users can enter an authoratative citation (e.g., the first description of a disease) or a more recent case or cohort report.